Brrrrr...Baby It's Cold Outside!! I love the snow but this bitter cold can end just anytime. I'm not complaining though. At least when it is this cold the snow we do get sticks around for awhile and that makes my smile.
I received a Zutter Bind-It-All for Christmas and I really love it. I made a mini album to put new baby pictures in and then used the Zutter to bind it. Worked great and made my album look more professional. (I'll post pics whenever I can quit taking baby pictures long enough..LOL) I had a good friend who had a grandbaby the same day ours was born so now I'm making an album for her too. When I get this one finished, I'm going to start on another to give away here, as soon as I reach 25 followers. Come on, that's just six more people. Tell someone you know to come join us. Only followers will be eligible for the drawing.
Friday, January 21, 2011

Wednesday, January 19, 2011
DeeDee Has a New Granddaughter!!

Wednesday, January 12, 2011
A Quick Review
Just wanted to stop in real quick to say, the chili recipe I posted earlier this week was so good. At least that is the review in my house. It would definitely receive 5 stars from us. It's a very palate-pleasing recipe. Hubby liked it despite his great distaste for mushrooms..lol. Yep, he picked them out and was concerned I might be on mushroom overload. I assured him that could never happen. I love them. The sausage gives it a flavor that, obviously, makes it not your typical chili. I hope you will try it. And the fact you can put it in the crock pot and forget about it is also a plus in my book.
Brrrrrr......it is so cold. Stay warm and be safe.

Brrrrrr......it is so cold. Stay warm and be safe.
Monday, January 10, 2011
It's a Chilly/Chili Kind of Day
Let it snow, Let it snow! Hey, you can't control it you might as well enjoy it. What can be more beautiful in winter than the snow softly falling to the ground. As I sit here typing this, I can look out over the lake and watch the snow settling on top of the water. So pretty. If you haven't done it yet, step outside for a moment and just listen. There is nothing so quiet and pristine as a new snowfall. I don't think I ever let a snow go by without doing this...just step out on the deck and listen. The quiet brings such a "peace on earth", I love it!!
Well, I'm trying a new recipe today and thought I'd share it with you. It just seemed like a perfect day for a pot of simmering chili for supper and boy does it smell good. I'm sure my hubby will be excited when he comes home after being out in the cold.


Well, I'm trying a new recipe today and thought I'd share it with you. It just seemed like a perfect day for a pot of simmering chili for supper and boy does it smell good. I'm sure my hubby will be excited when he comes home after being out in the cold.
- 1 pound lean ground beef (90% lean)
- 1 pound bulk pork sausage
- 2 cans (16 ounces each) kidney beans, rinsed and drained
- 1 jar (24 ounces) chunky salsa
- 1 can (14-1/2 ounces) Hunt’s® Original Diced Tomatoes, undrained
- 1 large onion, chopped
- 1 can (8 ounces) Hunt’s® Tomato Sauce
- 1 can (4 ounces) mushroom stems and pieces, drained
- 1/2 cup each chopped green pepper, sweet red and yellow pepper
- 1/2 teaspoon dried oregano
- 1/4 teaspoon garlic powder
- 1/8 teaspoon dried thyme
- 1/8 teaspoon dried marjoram
- Shredded cheddar cheese, sour cream and thinly sliced green onions, optional
Directions
- In a large skillet, cook beef and sausage over medium heat until meat is no longer pink; drain. Transfer to a 5-qt. slow cooker.
- Stir in the beans, salsa, tomatoes, onion, tomato sauce, mushrooms, peppers and seasonings. Cover and cook on low for 8 hours or until flavors are blended. Garnish with cheese, sour cream and green onions if desired. Yield: 8 servings.
Saturday, January 8, 2011
Check Out this Blog Candy
Happy Saturday to all my blogger friends. I hope you've had a good day and was able to stay warm. It is so cold here...brrrr.
You need to check out this blog candy that is being given away over at Canadian Nickel. Lots of goodies in her give away. Go on over, leave her a comment and have a chance to win a bunch of scrappy stuff.
http://canadiannickelscrapn.blogspot.com/
You need to check out this blog candy that is being given away over at Canadian Nickel. Lots of goodies in her give away. Go on over, leave her a comment and have a chance to win a bunch of scrappy stuff.
http://canadiannickelscrapn.blogspot.com/
Thursday, January 6, 2011
A Quick, Little Tip
If you are a cardmaker/scrapbooker, here is a tip for you. Have you ever been into a project only to discover in all that stash of ribbon you have you just cannot find the right color to go with your card/layout? That happened to me the other day. With all the ribbon I have, I was determined I was not going to buy another roll of ribbon for this one project. So I decided it was either come up with a solution or use something instead of ribbon. My solution: I took a rubber stamp to my ribbon. Yep, I just rubbed a brown stamp pad over my ribbon to age it and make it match my project much better. See if you think so.....

 I hope you can see the difference. The original ribbon has a black and white stripe. Swiping the ribbon with the brown stamp aged that white and made it look so much better with the paper I had chosen for this card.


Sunday, January 2, 2011
Scrappy Scraps
What to do with all that scrap ribbon? You know all those little pieces you just can't bare to throw out because you just know you can find a use for them. How about making your own embellies for some of your Christmas layouts you are bound to be working on by now. Here is an example of a couple I made last year using scrap ribbon:


The first one was made using small lengths of ribbon glued into loops. I found the easiest way to attach the loops and to keep them even (you know, so they resemble a tree when you are finished) is to cut a piece of cardstock in a triangle shape the size you want your embellie to be. I like to start at the bottom of the triangle overlapping each row as I work my way to the top. A large loop at the bottom serves as the tree's trunk. Of course, you can top it off with a start or whatever you wish for your tree topper. I also used this same concept this year only sewing the loops onto a fabric triangle, then sewing the triangle to a tee shirt for my granddaughter. It turned out really cute.
Now, if you want to go the really easy route, the bottom tree embellie is strips of ribbon glued to a cardstock triangle once again. When you've gotten to the top, just turn it over and trim off the edges. Easy, peasy!!
Besides using them on layouts and tees, you could also use them on your cards.
I hope this gives you an idea of what to do with all those scraps you cannot bring yourself to trash.
I don't know who to give credit to for these ideas but I do know I got them from one of the scrappy groups I belong to.
Happy Holiday Scrapping my friends.
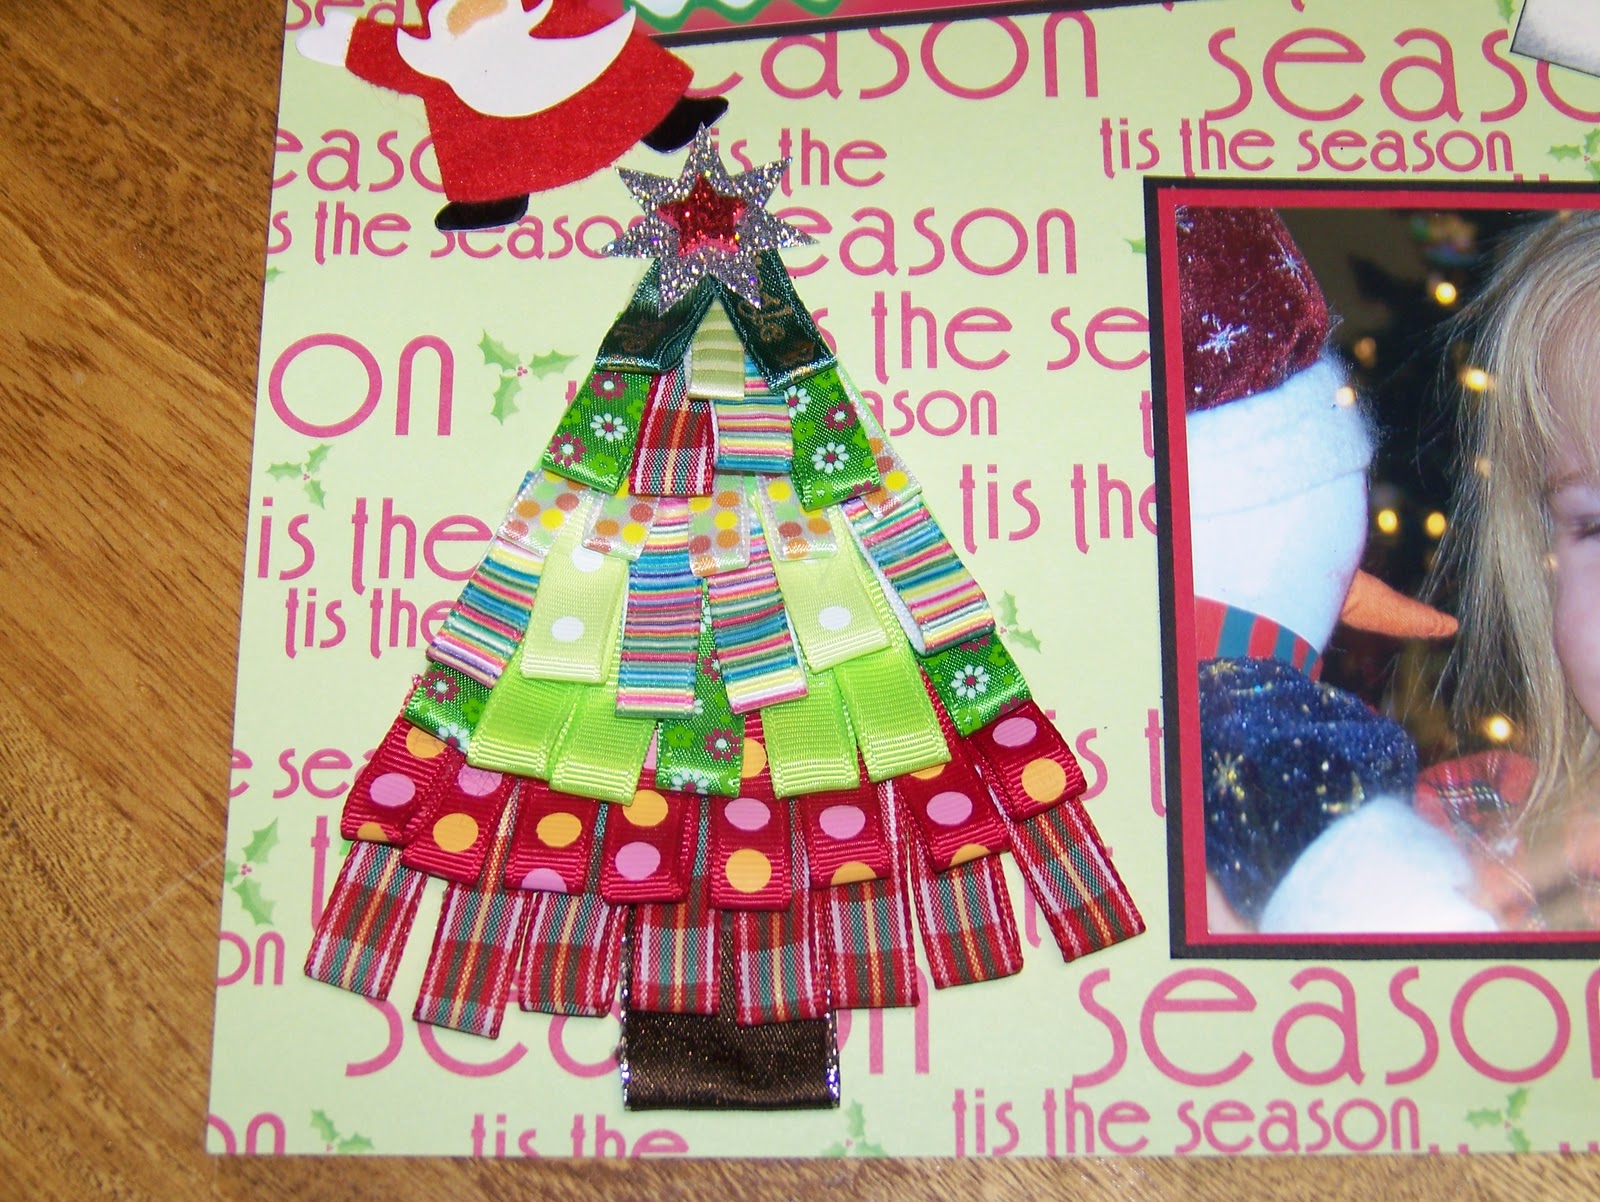

The first one was made using small lengths of ribbon glued into loops. I found the easiest way to attach the loops and to keep them even (you know, so they resemble a tree when you are finished) is to cut a piece of cardstock in a triangle shape the size you want your embellie to be. I like to start at the bottom of the triangle overlapping each row as I work my way to the top. A large loop at the bottom serves as the tree's trunk. Of course, you can top it off with a start or whatever you wish for your tree topper. I also used this same concept this year only sewing the loops onto a fabric triangle, then sewing the triangle to a tee shirt for my granddaughter. It turned out really cute.
Now, if you want to go the really easy route, the bottom tree embellie is strips of ribbon glued to a cardstock triangle once again. When you've gotten to the top, just turn it over and trim off the edges. Easy, peasy!!
Besides using them on layouts and tees, you could also use them on your cards.
I hope this gives you an idea of what to do with all those scraps you cannot bring yourself to trash.
I don't know who to give credit to for these ideas but I do know I got them from one of the scrappy groups I belong to.
Happy Holiday Scrapping my friends.
Subscribe to:
Posts (Atom)